1cm: (5s, f/3.5, ISO-320)

Exploring the Dark Chamber: Making a Camera Obscura

Angela Lin (adw), David Hua (aaj), Michelle Chang (aak)

Camera Obscura (noun): In Latin — “room” and “dark.” A darkened boxlike device in which images of external objects, received through an aperture, as with a convex lens, are exhibited in their natural colors on a surface arranged to receive them.

In a Dark, Dark Room

Perhaps one of the oldest imaging devices (dating back to Aristotle in the 4th century and China in the 5th century), camera obscurae take advantage of the pinhole image phenomenon — when the image of a scene on the other side of a partition is projected through an opening in said barrier, onto a surface on the opposite side. Often this requires a completely dark environment. In the 16th century, camera obscurae were popular aids for artists and painters.

How it works

A camera obscura mimics the human eye. Light enters from a small hole in the device, usually at an angle, and creates an upside down image. If the hole is of certain sizes (this often depends on the focal distance, or the distance between the pinhole and the opposite wall of the device), the light rays will converge, rather than scatter, and create a fairly sharp, recognizable scene. Thus, camera obscurae need not be confined to boxes. You can also create them with dark rooms and a window on a sunny day!

Creating the Camera

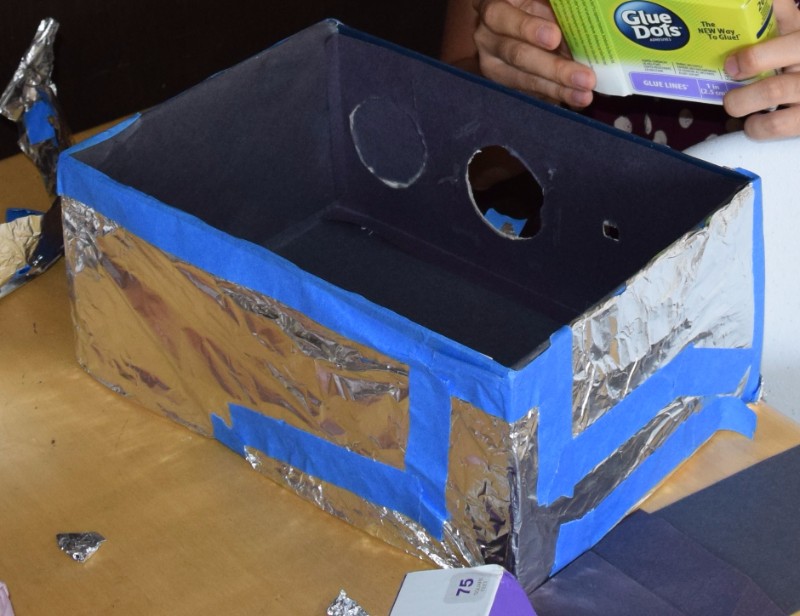
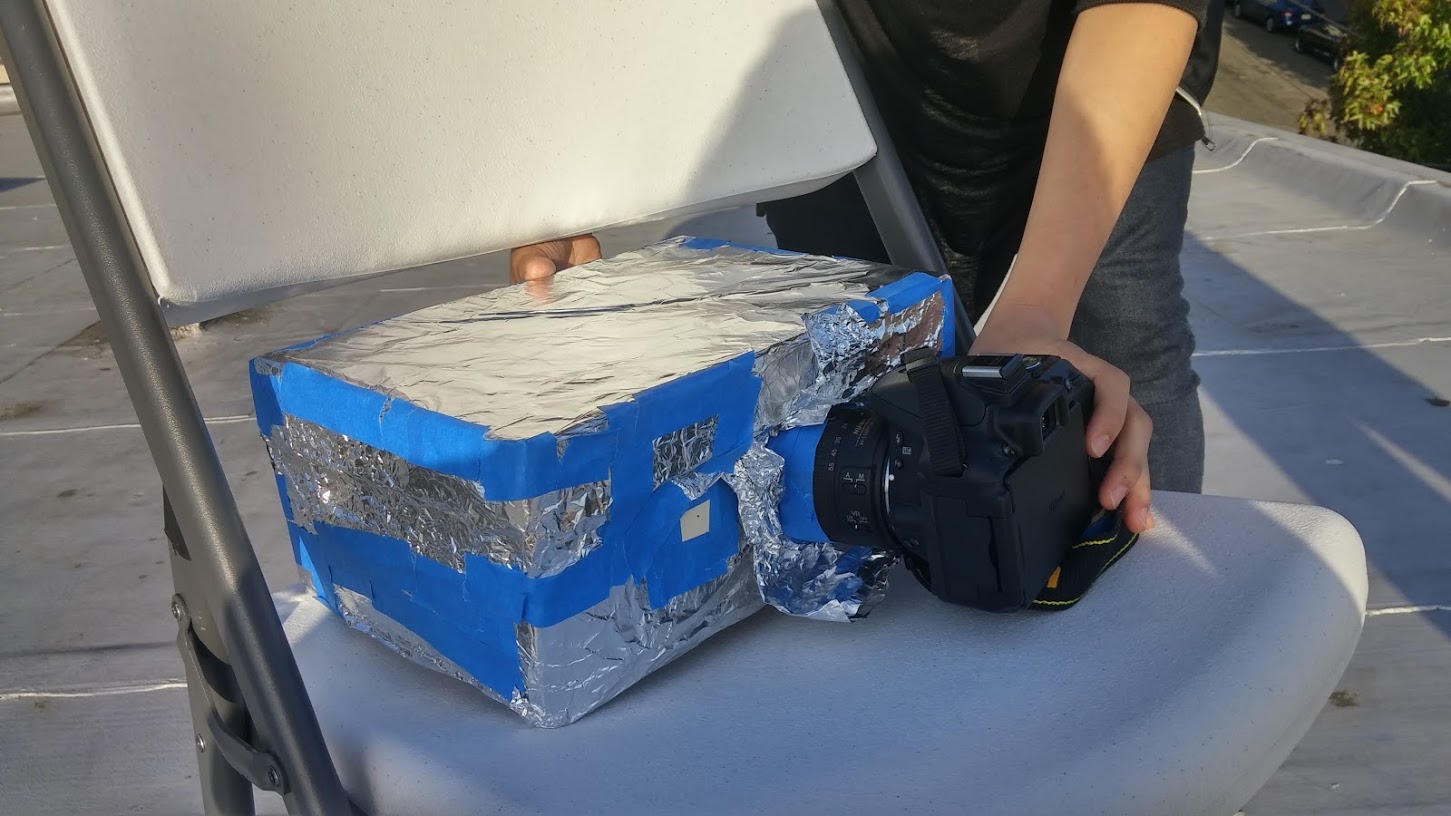
We used a cardboard (12 in x 8 in) shoebox as the base for our pinhole camera. We covered the interior (except the screen) with black construction paper and the screen with white printer paper. The corners and sides of the box were reinforced with duct tape, and the exterior entirely covered in aluminum foil. We cut a (7/16 in x 1/2 in) hole on the long face of the box facing the screen for the pinholes and a 2 3/16th inch diameter circular hole for the DSLR camera lens. A D5300 Nikon DSLR camera was used to capture the images.

Using the recommended formula for calculating pinhole size: 1.9 * sqrt(f * lambda), where f is the distance between the pinhole and the screen, and lambda is the wavelength of light, it can be found that the ideal pinhole size for our camera is around 0.62 mm (using f = 7.5 in, lambda = 550 nm).

To create pinholes of different sizes, we punched holes in cardstock with various implements (needles, mechanical pencil lead, etc.). We covered the back of each pinhole card with aluminum foil to block sunlight. The final pinhole sizes were 0.5 mm, 1 mm, and 2 mm. Pinhole cards were secured to the front of the box with painter’s tape.

Comparison of Pinhole Quality

Of the three images in both sets, the one taken with the 0.5 mm pinhole was the sharpest and the one taken with the 1 mm pinhole was the noisiest. The image taken with the 1 mm pinhole was noisy because the chad was not removed after the pinhole was created.

As we increased the pinhole size, the images became blurrier. The larger pinhole allows more light rays from the same point of the object to hit different points of the screen, resulting in blurriness. However, since the hole is larger, we needed a shorter exposure time to capture an image with the same brightness.

Gardener’s truck at the Berkeley Rose Garden

Hover over an image to view it fullsize.

0.5 mm: (15s, f/3.5, ISO-2000)

1 mm: (10s, f/3.5, ISO-2000)

2 mm: (8s, f/3.5, ISO-500)

Lower Sproul

Hover over an image to view it fullsize.

0.5 mm: (30s, f/3.5, ISO-1600)

1 mm: (25s, f/3.5, ISO-1000)

2 mm: (8s, f/3.5, ISO-640)

A Note on Visual Artifacts

We have a purple horizontal rectangle at the bottom of the screen of some of the images. After seeing this, we checked whether or not our box was light proof by covering the hole where we usually place the lens and taking a photo with a 30 second exposure. The resulting image was completely black. Thus, we think that the purple rectangle is a reflection of the black paper onto the white screen.

Thousand-armed deity (25s, f/3.5, ISO-320)

Highlight Images: 0.5 mm

When comparing our images, it appears that the images taken with the 0.5mm pinhole resulted in the highest feature clarity.

To view images fullsize: you know the drill by now.

Bridge (13s, f/3.5, ISO-1600)

Rose Garden (25s, f/3.5, ISO-2000)

Street (13s, f/3.5, ISO-2500)

Nasturtium (13s, f/3.5, ISO-2500)

Angela (15s, f/3.5, ISO-2000)

David and Angela (20s, f/3.5, ISO-2000)

Select Images: 1 mm

Chair (20s, f/3.5, ISO-320)

Group Photo (20s, f/3.5, ISO-320)

Bridge (20s, f/3.5, ISO-320)

Heart (20s, f/3.5, ISO-320)

Bells & Whistles: Light Painting

Using our camera obscura, we created light paintings by drawing images and letters in the air with flashlights in a dark room. We used a 2 centimeter pinhole to capture these images.

Cat (13s, f/3.5, ISO-320)

Flower (15s, f/3.5, ISO-320)

Smile (15s, f/3.5, ISO-320)

We also did several light paintings using the DSLR itself with long exposure.

Witch (15s, f/11, ISO-320)

Mage (13s, f/8, ISO-320)

Antlers (20s, f/8, ISO-320)

Source Acknowledgements: "camera obscura". Dictionary.com Unabridged. Random House, Inc. 16 Sep. 2016.